CGM Tips and Tricks for Better Accuracy and Less Frustration
By Adam Brown
.jpg) What I’ve learned from 50,000 hours using CGM
What I’ve learned from 50,000 hours using CGM
I’ve been extremely lucky to use and study CGM since my first summer at diaTribe and Close Concerns seven years ago (over 50,000 hours now!), and I’ve seen this technology’s high points, limitations, and progress. Since I often hear frustration that CGMs are not accurate, that alarms are annoying, and adhesive is a pain, I wanted to share some tips and tricks from personal experience and research.
Separately, I’ve also been very hard at work finishing my upcoming book, Bright Spots & Landmines – stay tuned for updates very soon in diaTribe!
[Editor’s Note: As always, this article should not be interpreted as medical advice. Consult your healthcare provider before making significant changes to your routine, particularly if you are on insulin.]
Accuracy
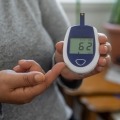
Take CGM calibration extremely seriously: (i) always wash hands before taking a fingerstick; OR (ii) when hand washing isn’t possible, wipe the first drop of blood and use the second drop. These two strategies can help avoid a major source of CGM inaccuracy: dirty hands -> inaccurate BG meter readings -> inaccurate CGM calibration -> worse CGM accuracy.
When the CGM and fingerstick meter values are very different, wash hands and take another fingerstick to confirm the BG meter is actually correct (especially if dosing insulin). Upon a second fingerstick, I often find the CGM is correct and the first meter value was reading falsely high (from not washing my hands!). This strategy has prevented me from taking dangerous insulin overdoses many, many times.
Try not to calibrate a CGM when glucose is low or rapidly changing. Both of those times can drive worse accuracy. I find morning and right before bed are great times to calibrate – hands are clean and glucose tends to be stable.
CGMs have higher inaccuracy on day one, especially in the hours after sensor insertion. Approach day one with patience and caution – especially for insulin dosing – since this is a limitation of the technology. CGMs tend to get more accurate the longer they are worn, so don’t give up if accuracy is frustrating in the first 24 hours. Accuracy will eventually decline, though this varies by person and by device – some people wear their CGM sensors for three weeks, while others can’t get more than 7-10 days.
-
One trick I use to improve day one accuracy is to insert a sensor, but not “start” the official sensor warm-up for 3-12 hours. This is best done when the previous sensor session is about to expire (e.g., on day 6.5), meaning I wear two sensors at one time – the current one that is still running and giving me data, and the new one that is inserted into the body but not connected to the transmitter. When the previous CGM expires, I simply put the transmitter on the new one and then start the official two-hour warm-up. This extends the new sensor’s warm-up and brings much better day one accuracy. Patient innovator Dana Lewis calls this “soaking the sensor,” and it really works.
If CGM readings do not track well with your BG meter, try switching to a different brand of meter (for calibration) or another CGM brand. BG meters and CGMs are not perfectly accurate devices; both have inaccuracy and both measure glucose in different areas of the body. If you do not get good results from one brand or model, switching to another may help - some people see brand-related differences. I’ve personally seen great results with the Dexcom G4/G5 and the Ascensia Contour Next meter for calibration. Obviously insurance and other factors play a role in this decision, so switching on a whim is not always possible. If you’re considering a new CGM, those with lower “MARD” values will typically be more accurate, on average.
Alarms and Trends
View CGM values and alarms as a helpful speedometer for diabetes, not a “bad” driving grade. Changing my relationship to CGM - a partner instead of a nag - makes a huge difference in frustration levels. I’ll have a ton more to say on this in my upcoming book.
If CGM alarms become annoying, set them at conservative thresholds or don’t have them on at all. For instance, starting with alarms at 70 mg/dl (low) and 250 mg/dl (high) and tightening them over time can help minimize frustration. My alarms are set at 80 mg/dl and 150 mg/dl, allowing me to catch highs and lows very quickly; the tradeoff to that tighter range is getting more alarms. Your preferences will vary.
Never overreact to high alarms with aggressive bolus insulin dosing (“rage bolus”), especially for those on pumps. Always account for “insulin on board” or “active insulin” before taking additional insulin. Blogger and diabetes thinker extraordinaire Ms. Kerri Sparling coined the term “rage bolus,” and it’s very easy to do when you’re on CGM – you notice how slow insulin actually works, particularly after meals. I only add insulin if I don’t have enough on board to get back to my target of 100 mg/dl.
-
I generally assume two-thirds of my bolus insulin is gone after two hours, meaning a three-unit bolus at 12 pm has about one unit remaining “on board” at 2 pm. I have my active insulin time set to three hours, since I take pretty small boluses (0-3 units) on a lower-carb diet. When I take larger boluses, the insulin is actively lowering glucose for four hours or longer. Your timing may vary.
CGM often has lag time in hypoglycemia, so use caution before overeating too many correction carbs. If I’ve eaten my hypoglycemia correction (e.g., a couple glucose tabs), but the CGM still says I’m low, I try to confirm with a BG meter 15-20 minutes later before eating extra correction carbs. Often my BG has already recovered, but the CGM isn’t showing it yet.
Pay attention to trend arrows – they can be helpful for adjusting insulin doses up or down. For example, a rising arrow(s) indicates BG is increasing and may require more insulin; a falling arrow(s) may require less insulin. It takes individual trial and error to find the right adjustment factors; you can read one recommendation here (page 5) from the great Drs. Steve Edelman and Jeremy Pettus. I noticed Dexcom also has some good general tips at dexcom.com/fingersticks.
Trend arrows can also help proactively prevent hypoglycemia. For instance, with a glucose of 90 mg/dl and a single arrow down, my glucose will be under 70 mg/dl within 15 minutes. Taking fast-acting carbs (5-10 grams) preemptively can sometimes help avoid the low before it even occurs.
Adhesive and Tylenol
If the sensor adhesive peels off your body, try taping it down or using Skin-Tac. I personally like Simpatch or Durapore tape. Simpatches are pre-cut, oval-shaped pieces of tape with a hole for the transmitter - they're great! For Durapore, I put four pieces around the sensor adhesive to secure it down.
If you get adhesive allergies, try spraying Flonase on the skin before inserting the sensor. Others like educator Gary Scheiner recommend applying a Band-Aid Tough Pad to the skin first, then inserting the sensor right through it.
Try different sensor wear locations to find what works best for you. I’ve noticed more people wearing sensors on the back of the arm, a location I’ve also used in addition to the abdomen. I generally don’t see great accuracy on the buttocks or legs.
Use caution with acetaminophen/paracetamol-containing products (e.g., Tylenol), since they cause false high readings for some devices. This currently applies to Medtronic CGMs and Dexcom’s G4/G5. If you use one of these devices, you should ignore sensor glucose values for the next 8-10 hours after taking these products.


